To be able to use Onpage Hero, you’ll first need to set up and install Google Tag Manager.
Google Tag Manager is a powerful free tool that allows you to deploy your analytics more efficiently and makes event tracking super easy.
This step by step guide will walk you through the process of getting up and running with Google Tag Manager and how to use it with OnPage Hero.
What is Google Tag Manager?
Google Tag Manager is a tool that allows you to deploy tags – snippets of JavaScript code – across your site or mobile app. These tags allow you to easily connect a whole host of third-party services such as AdWords Conversion Tracking and Remarketing, AdRoll and of course good old Google Analytics.
Google Tag Manager allows you to choose from pre-existing tags, such as a form submission, and then choose which pages you want to add this too. GTM takes care of the rest – no need to change the code on your website.
Google Tag Manager consists of the following three functions:
- Tags – third-party service which will execute the tracking Universal / Google Analytics, Facebook etc.
- Triggers – when to measure, for example on all pages, on just some pages, on a specific page, form submission or button click.
- Variables – things to measure, a form id, a button id etc.
These tags, triggers, and variables are stored and can be combined with each other to track what you want. This method speeds up your analytics workflow because you can re-use tags, variables, and triggers rather than starting from scratch.
What is the difference between Google Analytics and Google Tag Manager?
There is some confusion surrounding Google Tag Manager (GTM). One major misconception is that Google Tag Manager is an updated version of Google Analytics. This is not the case: Google Tag Manager and Google Analytics are separate tools.
Google Tag Manager is like a very efficient butler that delivers pieces of code to third-party tools like Google Analytics. It acts as a go-between.
When it comes to Google Analytics and GTM working together typically you use the following workflow:
- Set up your custom events and the items you want to track in GTM.
- View and analyze the data in Google Analytics.
Google Tag Manager does not replace Google Analytics. It is a tool that makes Google Analytics deployment easier.
What are the benefits of Google Tag Manager?
Let’s say, for example, you wanted to track form submissions on multiple landing pages. Without Google Tag Manager, you would have to hard code a piece of JavaScript and then add this code to all the pages you wanted to track. With Google Tag Manager, you create a Google Analytics tag and use predefined variables to set it up.
- Easier deployment – when you need to update code, GTM allows you to do this very quickly and update the entire website without editing source code.
- Event monitoring – GTM makes it very simple to monitor custom events like e-commerce conversions, form submissions, or button clicks.
- Simple integration with many third-party services (Facebook, Google Ads, Onpage Hero).
Google Tag Manager step by step installation guide
The installation steps for Google Tag Manager will vary depending on your current setup. For this reason, we are going to walk through the most common configurations.
Migrating from Google Analytics to Google Tag Manager
Use case: You are already deploying Google Analytics on your website, but you are not currently using Google Tag Manager.
In general, the steps for migrating Google Analytics to GTM are as follows:
- Determine the type of existing Google Analytics installation
- Disable any plugins/remove all Google Analytics code
- Create GTM container
- Add GTM code to the website
- Create GA trigger in GTM
- Test installation
1. Determine the existing Google Analytics installation
There are a few ways to deploy Google Analytics.
- Directly in source code – Google Analytics is hardcoded into your site.
- Direct CMS integration – Google Analytics is deployed directly through a CMS such as WordPress.
- CMS plugin – Google Analytics runs via a CMS plugin
- CMS code injection – Google Analytics code is injected into the headers and footers of your website.
Before continuing, please check to see how your existing Google Analytics is deployed.
2. Disable any Google Analytics plugins / remove all Google Analytics code
Removing or disabling existing Google Analytics code or plugins is vital because this avoids duplicate data when we install Google Tag Manager.
Disabling Google Analytics in WordPress
If you are currently using Google Analytics for a WordPress site, you will need to ensure that any Google Analytics code is disabled or removed. Typically, Google Analytics is installed on WordPress using one of the following methods:
- Plugin – if you are using a Google Analytics plugin, you need to disable it to install GTM.
- Header/Footer injection – if you are injecting Google Analytics code into the header and footer of your WordPress page you need to remove this code.
- Hardcoded – if you have added the Google Analytics code directly to your WordPress template, you need to ensure this code is removed from all pages.
Note: If you are editing your website’s source code, ensure you have saved a copy or backed these files up.
Disabling Google Analytics in Squarespace or other CMS
If you are using another CMS such as Squarespace, please make sure you remove your Google Analytics deployment. Don’t worry; this doesn’t mean we are getting rid of valuable analytics data, we are just going to deploy it differently.
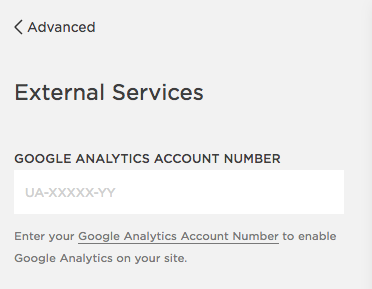
With Squarespace, this means removing your tracking ID from the menu. Settings > Advanced > External Services
Other CMS platforms might have a slightly different procedure. If you are unsure as to how to remove Google Analytics, then check your CMS’ documentation or chat with customer support.
No CMS platform
In this case, you will need to remove your Google Analytics code from your site manually. Make sure if you are editing source code directly always to back up the files or keep a copy. If you are unsure about how to do this, you may need to speak with a programmer. In general, installing GTM is no more complicated than installing GA – if you were able to do that, you will be able to install GTM.
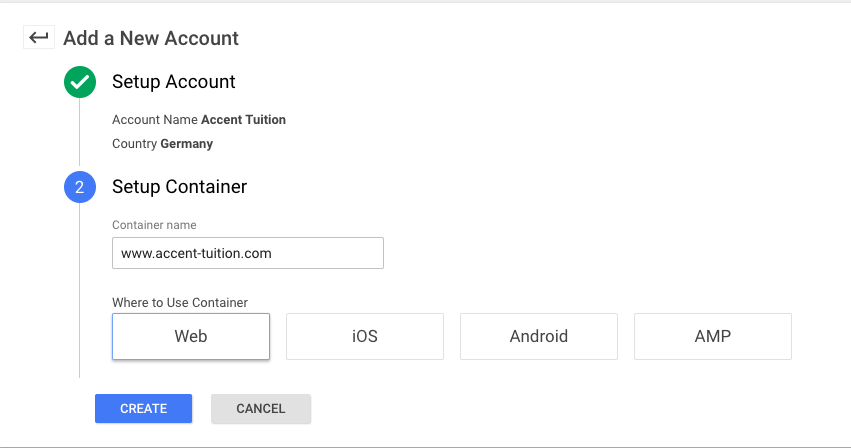
3. Create a new GTM container
If you haven’t already done so, sign up for GTM. Give your account a name related to your business and select your location. Next, give your container a name, usually the same as your web address. Finally, choose where the container is going to be deployed and click Create.
Accept the data privacy terms and conditions and continue to the next screen which shows the code snippet.
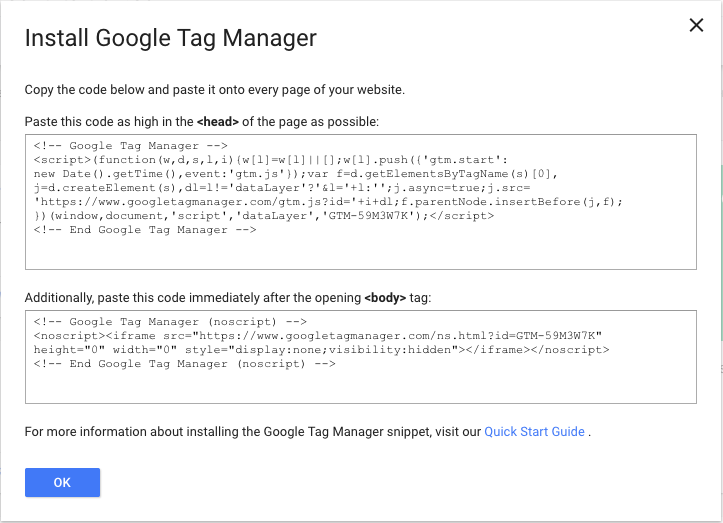
4. Add GTM code to your website
Now, it’s time to add the actual Google Tag Manager code to your site. This is considered the trickiest step. However, this method will ensure you add your GTM code in a foolproof way.
For CMS platforms this step involves adding the GTM code snippet to the header and footer tags. First up, copy the first code snippet. If the code does not appear automatically click on ADMIN > Install Google Tag Manager to display it.
Adding Google Tag Manager Code to WordPress
Method 1: Using the Header and Footers plugin
The easiest way to install this code to your website is with a WordPress plugin called Insert Headers and Footers.

This handy plugin allows you to inject the code into all pages by copying and pasting it into a box. This is great for non-technical users as it does not allow you to edit the actual source code of your template. This eliminates the risk of making a mistake that will affect your website’s performance.
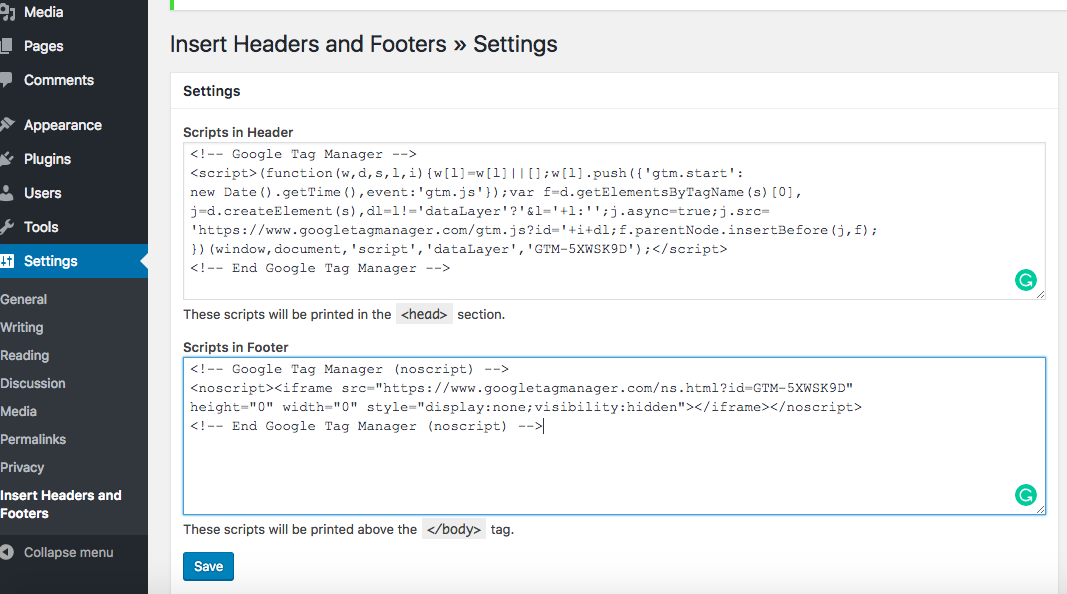
Once installed, navigate to Settings > Insert Headers and Footers. Paste the first Google Tag Manager code into the first text box of the plugin labeled, Scripts in Header.
Next, copy the second GTM snippet and paste it into the lower section of the plugin, Scripts in Footer. Finally, click Save.
Method 2: Editing the template code directly
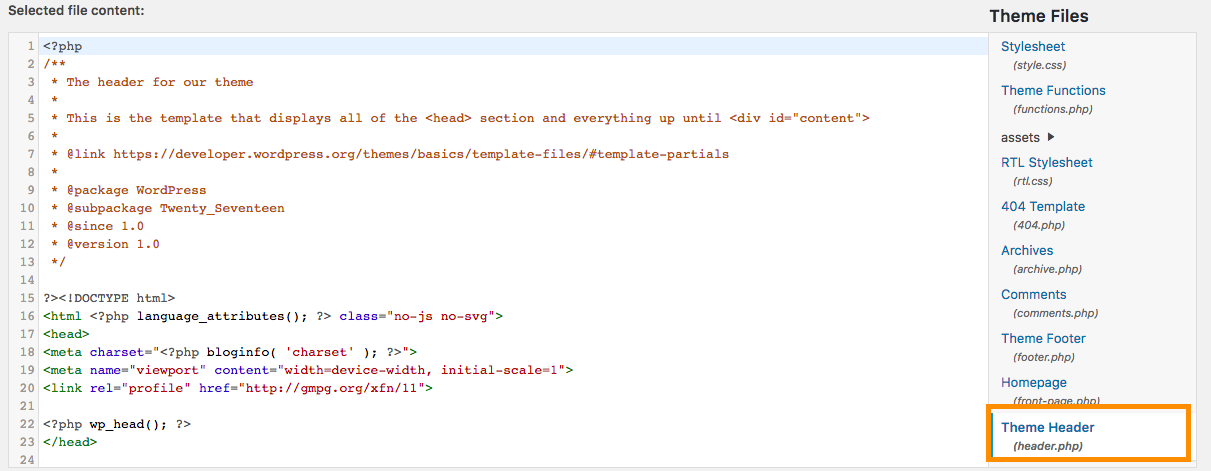
If you don’t want to install a plugin, you can simply enter your WordPress admin dashboard and navigate to Appearance > Editor.

This allows you to edit your template code directly. Click on the header.php file.
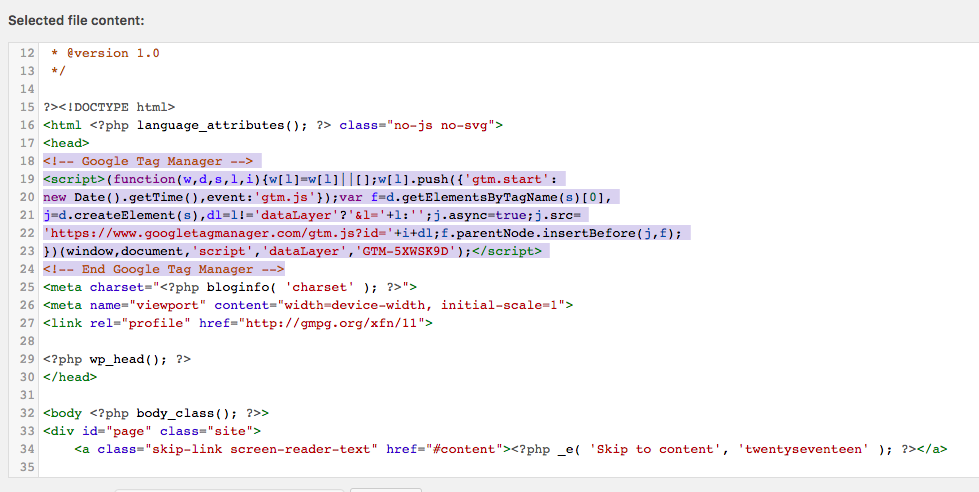
Paste the first code directly after the opening <head> tag:
Paste the second code directly after the opening <body> tag and save the changes.
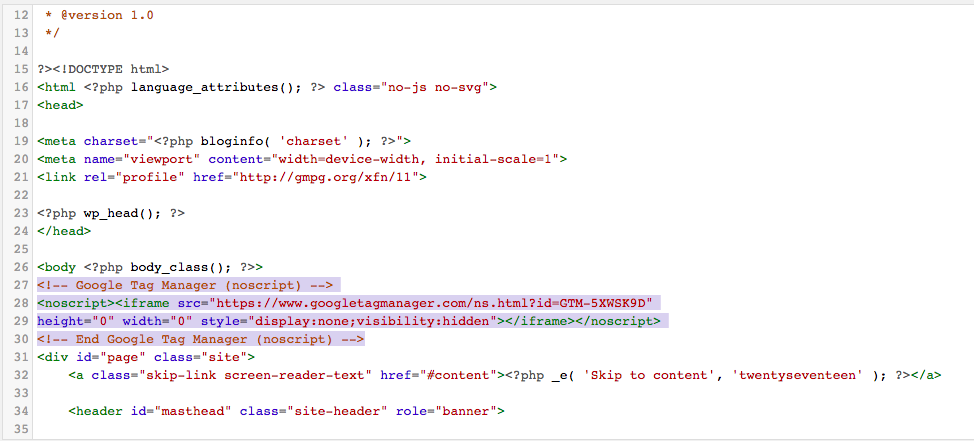
Be careful not to change anything else in this file. For beginner users, we recommend using the first method.
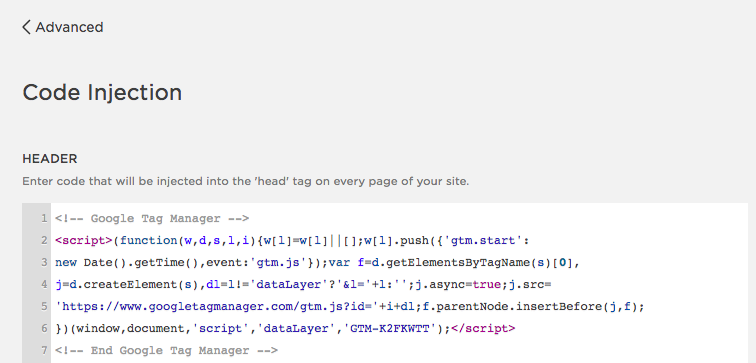
Adding Google Tag Manager Code to Squarespace and other CMS
If you are using another CMS platform, first check with your provider for the best practice method for installing Google Tag Manager. In general, the technique is effectively the same for all CMS – as with WordPress you need to inject the first Google Tag Manager code snippet into the header and the second into the footer. Settings > Advanced > Code Injection
No CMS
If you are not hosting your website via a CMS, you need to edit the source code directly and insert the snippets into all pages that you want to track. This is the same as the WordPress method of modifying the code directly. Make sure to keep a copy of your source code files when editing directly.
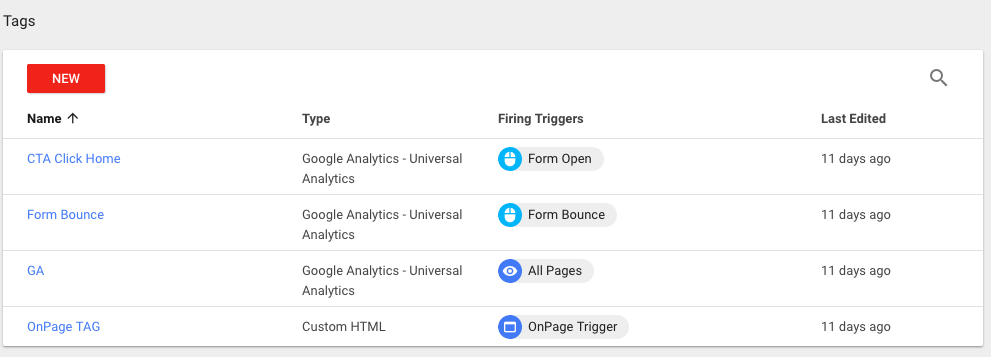
5. Create GA trigger in GTM
Ok, that’s the difficult part over. Now, it’s time to create your first tag in Google Tag Manager. This tag is going to deploy Google Analytics across your site.
Firstly, head to your GTM dashboard.
Click New Tag.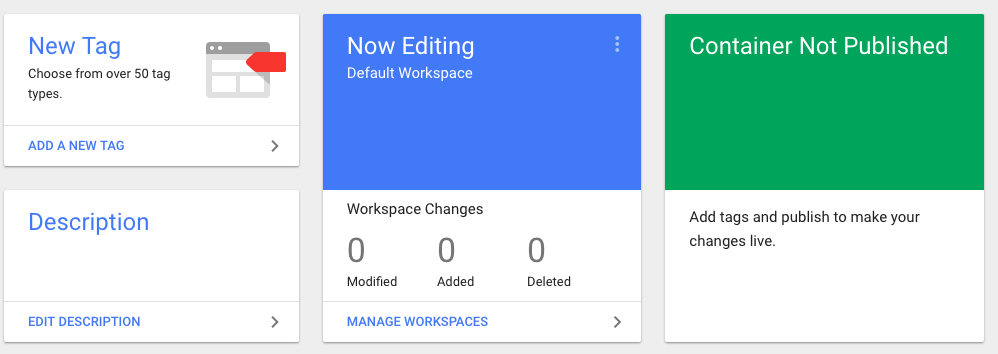
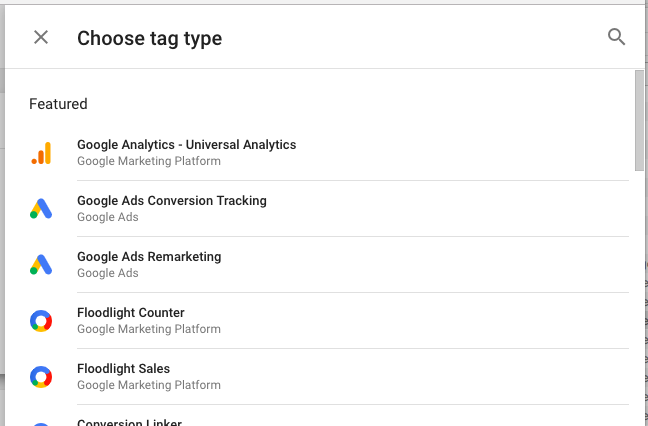
Select Tag Configuration. Choose the first tag Google Analytics – Universal Analytics.
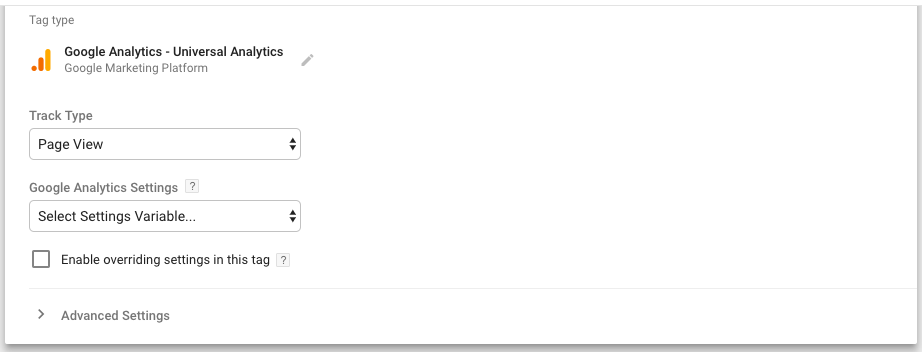
Leave Track Type set to Page View and then select New Variable from the Google Analytics Settings drop-down.
Add your Google Analytics tracking ID and leave Cookie Domain set to auto.
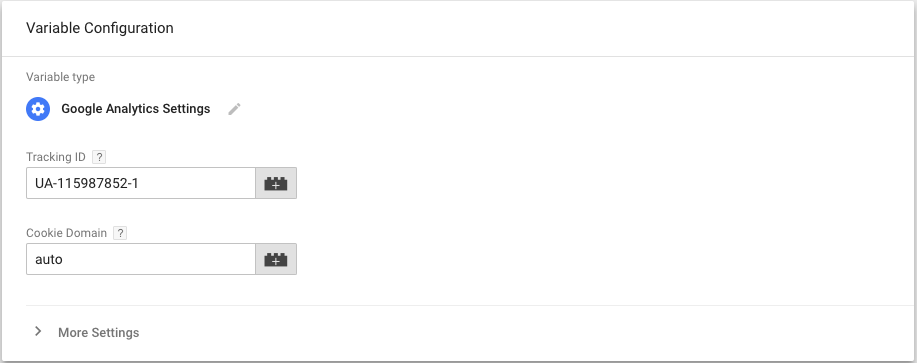
Important: add the tracking id of the Google Analytics property you want to track.
(You can find your Tracking ID from within your Google Analytics property by clicking the settings icon and then Property Settings.)
Give the variable a name such as Google Analytics Tracking ID and click Save. Finally, give the tag a name (Google Analytics) and click Save again.
6. Testing the Google Tag Manager installation
Phew, that’s it! The hard work is done. Now, it’s time to test the GTM installation is working correctly. To do this, we are going to do two things.
Firstly, we want to see if the GA tag is firing correctly.
Hit PREVIEW in the top right corner of your GTM dashboard to enter Preview Mode and navigate to your website.
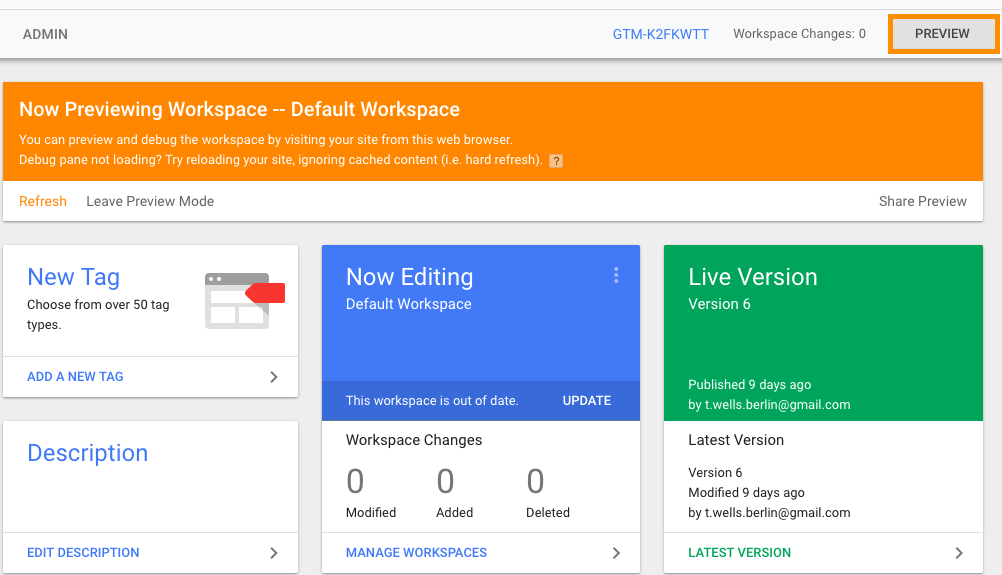
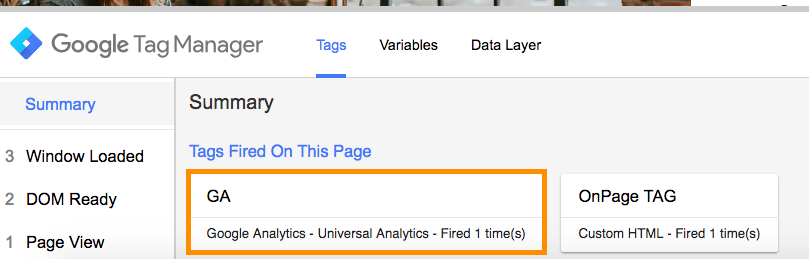
The Google Tag Manager debugger will automatically pop up at the bottom of the page. You will see the tag Google Analytics tag firing if your installation was successful.
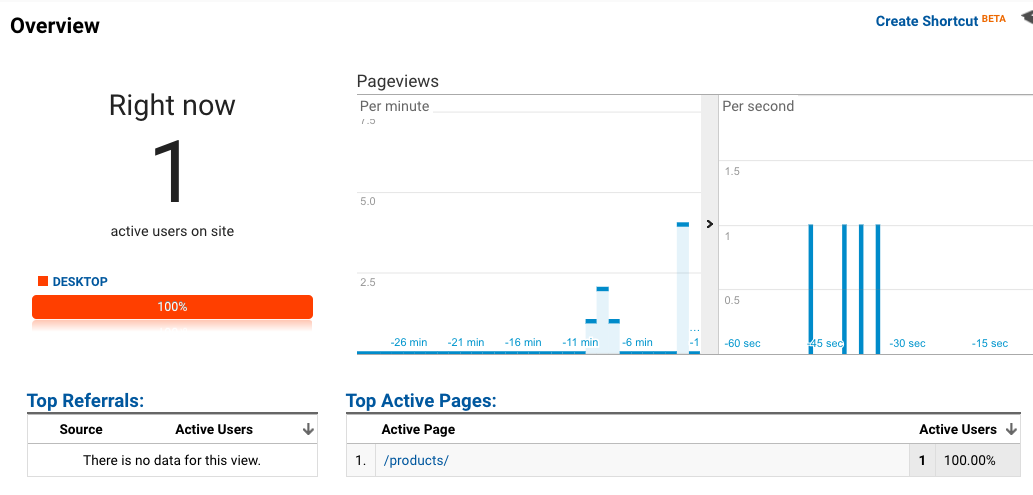
To double-check that your installation is correct you can navigate to within your Google Analytics property.
Under the tab, Real-Time > Overview check that when you are on a page of your site that Google Analytics is picking this up as a real-time user. Make sure that when you click through the pages that Google Analytics is only recording one event for each page click. If you see a doubling of these events it usually means that Google Analytics code is still being deployed somewhere other than in Google Tag Manager and needs to be removed.
And that’s it! Congratulations you have now correctly installed Google Tag Manager and created a Google Analytics tag. You can now view all your Analytics data as before from within your Google Analytics dashboard.
No Google Analytics installation?
Not using Google Analytics?
Sign up for Google Analytics and create a property. You don’t need to install the Google Analytics tracking code on your site. After signing up, follow the steps in this tutorial to install Google Analytics via Google Tag Manager.
Onpage Hero and Google Tag Manager
Once you have correctly set up Google Tag Manager, installing Onpage Hero is a breeze. Just follow the steps in this guide to get up and running.
Please get in touch if you need any support and our team will be happy to help.
Happy SEOing!