To turn Google Analytics into a fully-fledged SEO suite, you need to set up Onpage Hero first.
All you need to have is a Google account, access to Google Analytics and the Google Tag Manager. Setting up Onpage Hero is really simple and consists of the following four steps:
- Creating an Onpage Hero account.
- Selecting a Google Tag Manager Container.
- Selecting the right Google Analytics Property.
- Adding the appropriate SEO data points.
- Using GA as SEO suite.
This might seem a lot but the user flow is very straightforward and simple and will literally take less than four minutes. This article is a step by step tutorial on how to do set up Onpage Hero properly.
Creating an Onpage Hero account
The very first step is to create a user account. You can use it to manage all the domains that you want to use Onpage Hero with. To make this easy, the Hero uses Google’s login feature. You can use any Google account, it doesn’t have to be a Gmail account.
Onpage Hero does not support multiple users yet. So, if you intend to share the account with your colleagues or friends, it makes sense to create a new email address that you can share.
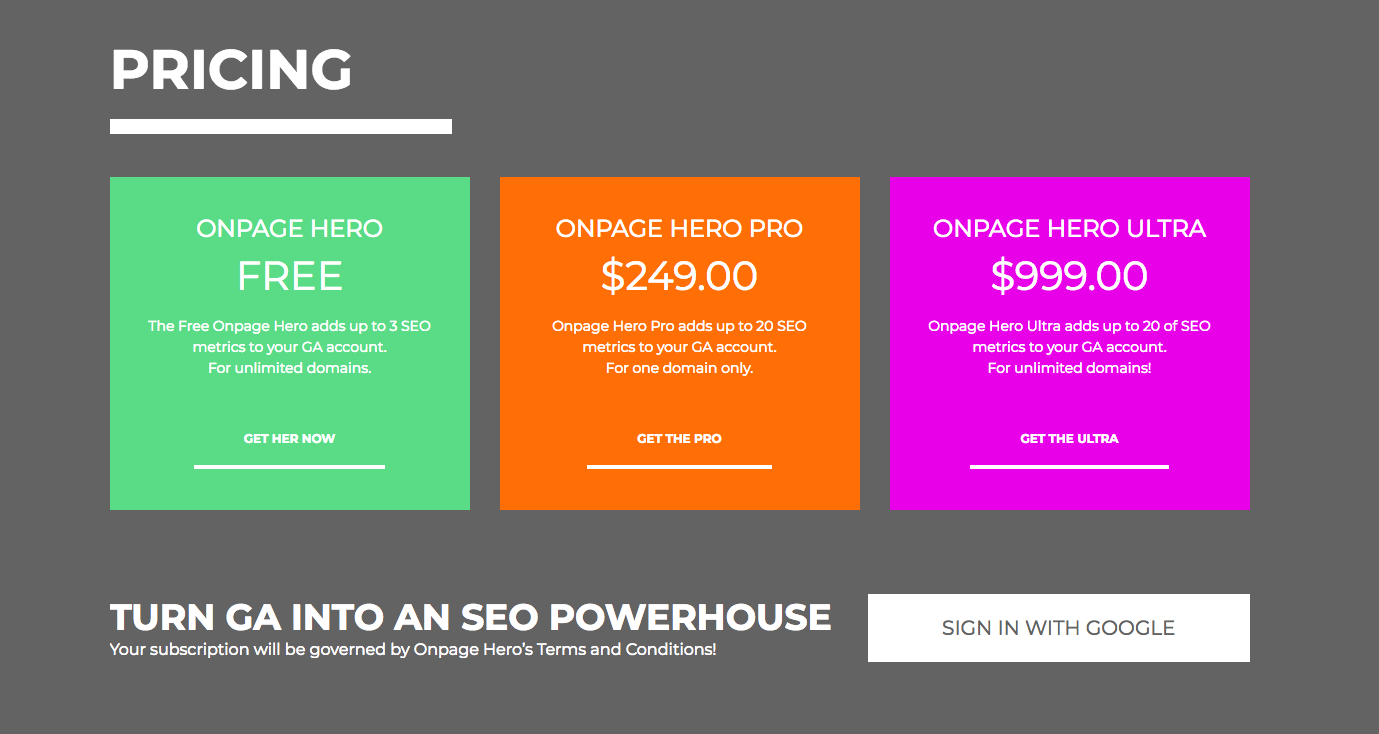
To sign up for Onpage Hero, you go to onpage-hero.com and click on login at the top right corner of the header menu or click on the Log in with Google button here.
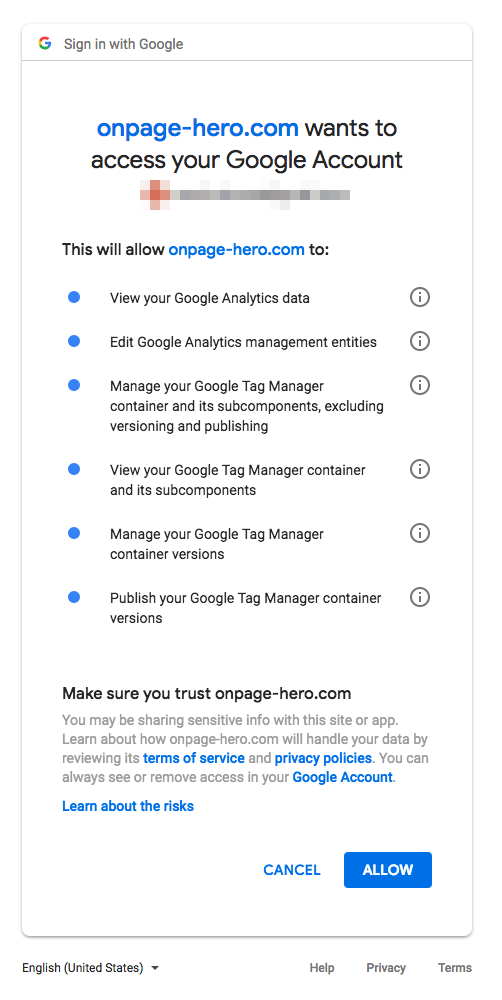
After you clicked on Sign in, you will be redirected to Google and asked whether you will give Onpage Hero access to quite a lot of Google properties, among them:
Read access to Google Analytics: the Hero needs this to see what kind of Custom Dimensions you already have so that they aren’t overwritten.
Edit access to the GA Management API: this is needed by the Hero so that she can create the new SEO data points inside your Google Analytics account.
Access and publishing rights for the Tag Manager: She will run a simple JS on your site that captures all the SEO data points you selected, whenever a user comes to your site.
Onpage Hero needs all of those rights as without it she can’t create the new data points nor could she analyze your HTML code without it.
Selecting a Google Tag Manager Container
In the first step of the setup process, you need to select the GTM (Google Tag Manager) container that is up and running on the site that you’d like to use with Onpage Hero. If you don’t have GTM running, here is a quick start tutorial by Google.
Google Tag Manager isn’t only great for Onpage Hero but for all sorts of things and it’s something we recommend having anyways.
To be able to select the container, you need to have publishing / rollout rights. Sometimes, you will see all the accounts on the left greyed out, and you can’t select one. If this is the case, then you don’t have the necessary permissions that the Hero would need. Now you have three options:
- Go ask the appropriate person to give you those rights.
- Log into a different, existing Google account that has those rights (click on change account).
- Add a new Google Tag Manager container on the site (if the log in credentials are lost, etc).
In the very left column, you will see the GTM accounts that you have access to and in the right column, you’ll see the containers that are connected to those GTM accounts.
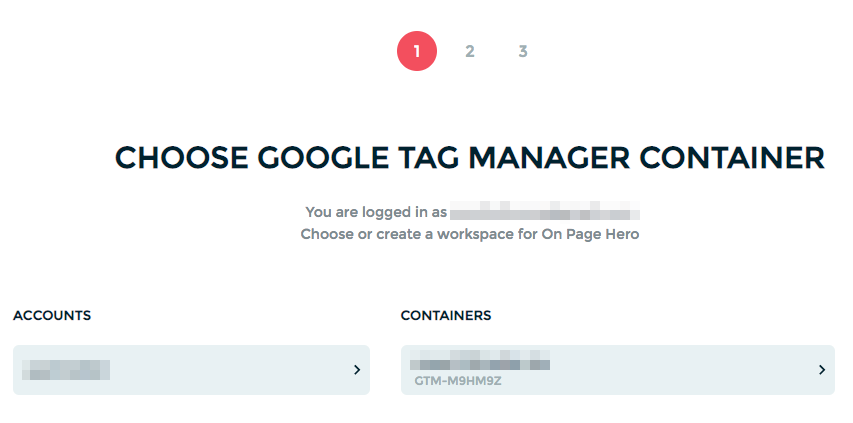
Boom, that’s it. The first part is now successfully accomplished. We now move onto selecting the right Google Analytics View!
Selecting a different Google account
If you aren’t logged into the right Google account or don’t have the necessary permissions, you can click on the Change account link, next to your email address. Now you can log into a different Google account.
Selecting a Google Analytics property
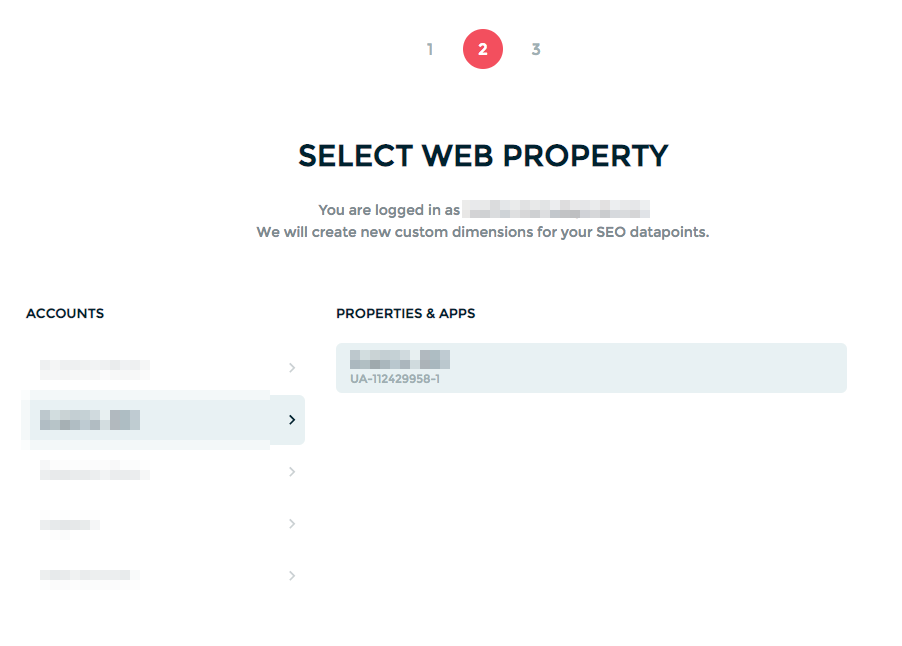
Now that you have chosen the GTM container that runs on your site, you need to select the corresponding Google Analytics property.
The Google Analytics property you select will, later on, contain all the SEO data points that you select in the next step. For each of the data points, you’ll select, the Hero will create custom dimensions in that Google Analytics property.
We mimic Google Analytics hierarchy, so on the very left you again choose the Google Analytics Account and on the right, you select the Google Analytics Property.
Again: if you chose a GTM container that runs on domains xyz.com, you now need to select the Google Analytics Property that you use for xyz.com.
Selecting a different Google account
If you aren’t logged into the right Google account, you can click on the Change account link, next to your email address. Now you can log into a different Google account.
Adding your SEO data points
Good job so far, you’ve done most of the work! Now that you have selected both the GTM container as well as the corresponding GA property, you need to think about the SEO data points you want to have in Google Analytics. While the Hero would love to give you all she’s got, the normal GA version restricts you to a maximum of 20 custom dimensions.
If you are already using custom dimension in Google Analytics, you obviously have even less space for the Hero’s SEO data points. You can see this in the left column. Those are all the already existing custom dimensions for the Google Analytics property you selected. Anyways, 20 SEO data points are likely enough for the vast majority of use cases and most users will get their job done with less than ten, so don’t worry if some of your custom dimensions are already in use.
To select an SEO data point, you click on it in the right column, that contains all the possible data points that the Hero has to offer. After selecting it, it will appear on the left side.
After you have selected a data point in the right column, you can still delete it by clicking on the little x next to it in the left column.
Here is an extensive list that describes all the possible SEO data points that you can select.
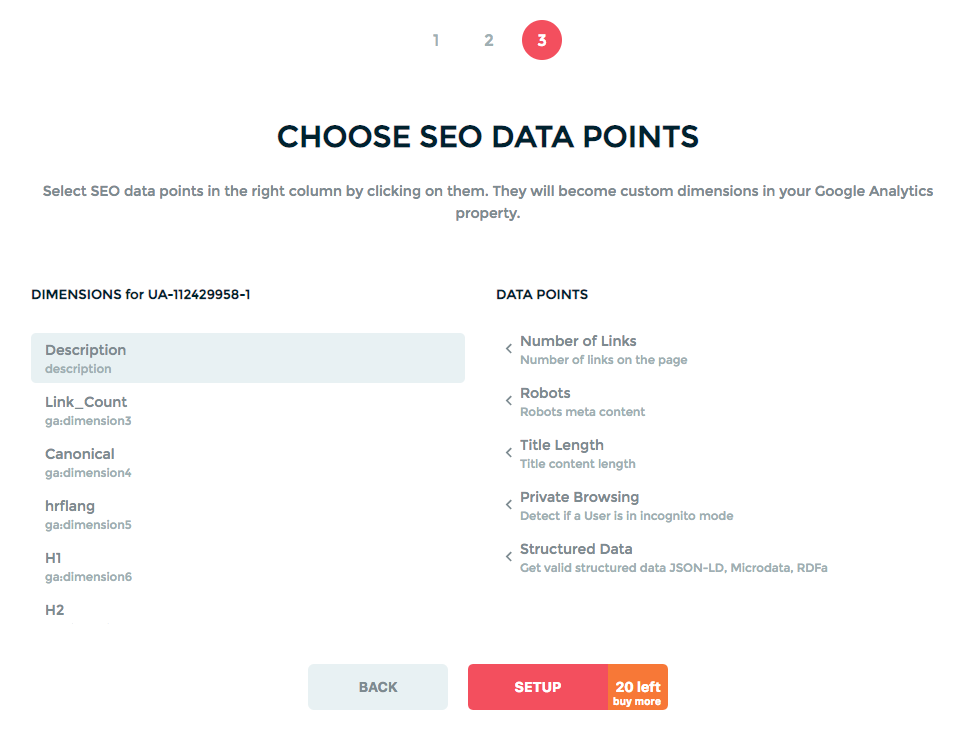
After you have selected all the SEO data points you’d like to add to your GA, you can click on SETUP.
Congrats!! You’re done, you turned your Google Analytics property into a powerful SEO suite. Read on to understand how to make the most of it.
Using GA as SEO Suite
Starting a couple minutes after your successful setup, Onpage Hero will deliver SEO data as hit-based Events into Google Analytics. This is really important to understand: please make sure to look at your SEO data in the following way.
- Open Google Analytics.
- Select the property in which you created the Onpage Hero data points.
- In the left column, navigate to Behavior and Top Events.
- Select Event Label as the primary dimension.
- Add all SEO data points as secondary dimensions from the drop down.
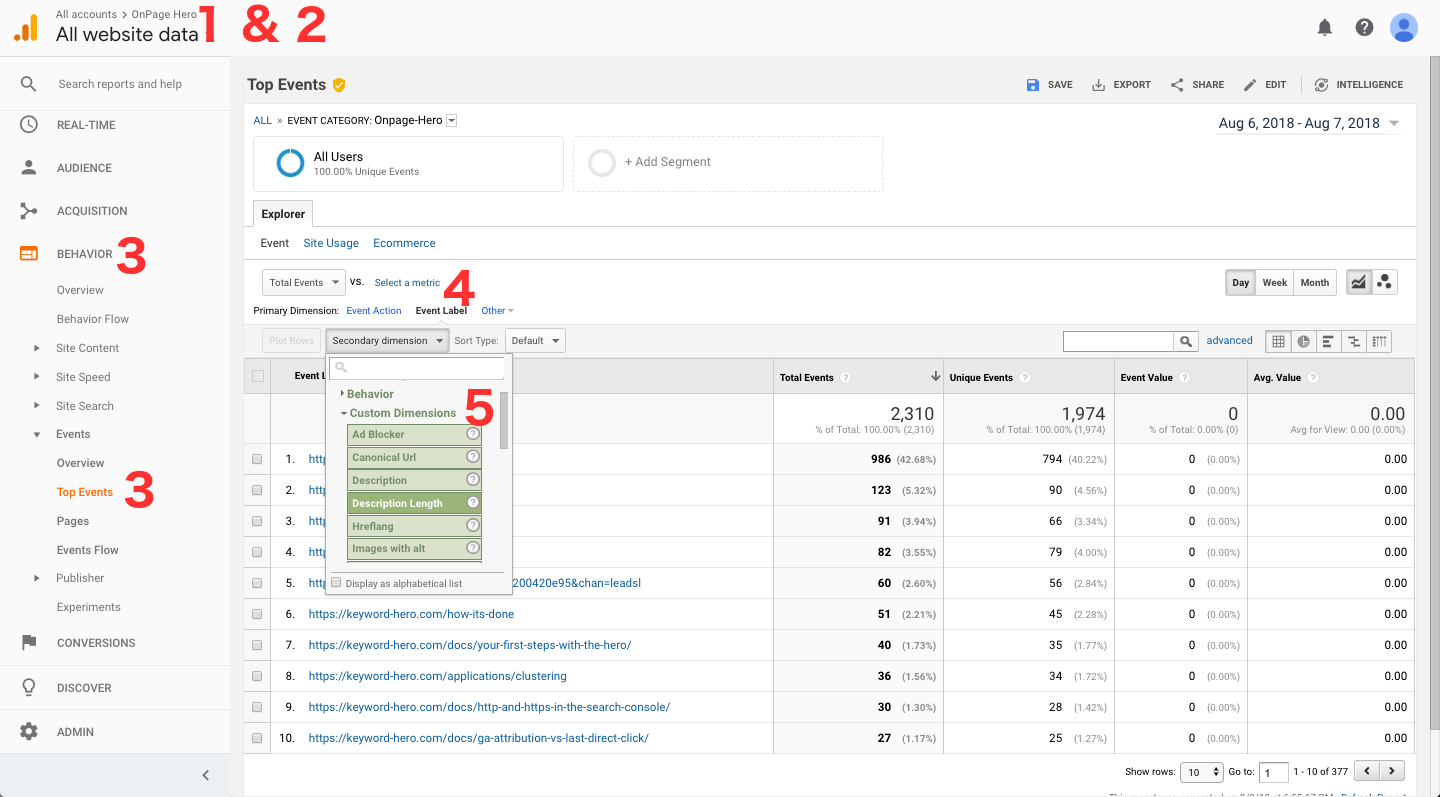
With each of your users surfing your site, you will get super accurate SEO data uploaded to Google Analytics, in real-time.
Hero’s Dashboards
To make it even easier for you, the heroine created a number of custom dashboards and reports that you can add with a single click to your Onpage Hero GA Property.